English
 Français
 Español


Oct 26,2026
Oven-Dehydrated Peppers: The Low-Temperature Method That Works
Skip the fridge-space fight and turn a surplus of chiles into brittle, snap-ready pantry staples—all with your home oven.
You brought home two kilos of ripe chiles from the market and the fridge is already full. Rather than watching them soften, you can have shelf-stable peppers by dinner tomorrow. The principle is straightforward: set the oven between 140°F and 175°F, keep a little air moving through the door gap, and let low heat pull moisture out of the pepper walls instead of cooking them. Done correctly, a batch takes anywhere from two to ten hours depending on thickness, and the payoff is a spice rack stocked with custom chili powder.
The Line Between Drying and Baking
Dehydration happens below the boiling point of water. Your oven becomes a slow air bath: at 140–175°F, moisture evaporates from the pepper surface while the cell structure stays intact. Above 190°F, the sugars start to brown, the skins can scorch, and the interior may remain damp even when the outside looks done. That dampness shows up days later as mold in a sealed jar.
“If a chile bends instead of snapping, it is not dry enough. If it cracks with gentle pressure, it is ready to store.”
Many home ovens cannot hold a low dial point, but that is manageable. If your oven bottoms out at 200°F, use the convection setting if available, keep the door cracked, and check every 20 minutes once the smell of fruit and spice starts to build. It still works, just faster and with less room for error.
Info: A clean way to keep the door open is to wedge a wooden spoon in the vent. You do not need a wide gap—just enough airflow to let the humid air escape.
Prep by Variety: Let Thickness Guide Your Cuts
Time in the oven is governed by wall thickness, not just heat. Thin-walled pods such as cayenne, Thai bird, and tabasco dry in roughly two to four hours left whole. Thick-walled peppers—jalapeño, poblano, bell, and most Italian frying peppers—need to be halved or sliced into ¼-inch strips; otherwise they may ferment before they fully dry.
- Wear disposable gloves while handling hot peppers, especially if you are working with habanero-level heat.
- Cut off the stem, then slice thick-walled peppers lengthwise. Leave seeds in if you want extra heat, or scrape them out for a cleaner layer of flavor.
- Sort by size so each tray finishes at roughly the same time.
- Arrange pieces in a single layer with air gaps between them—overlapping slows the edge areas.
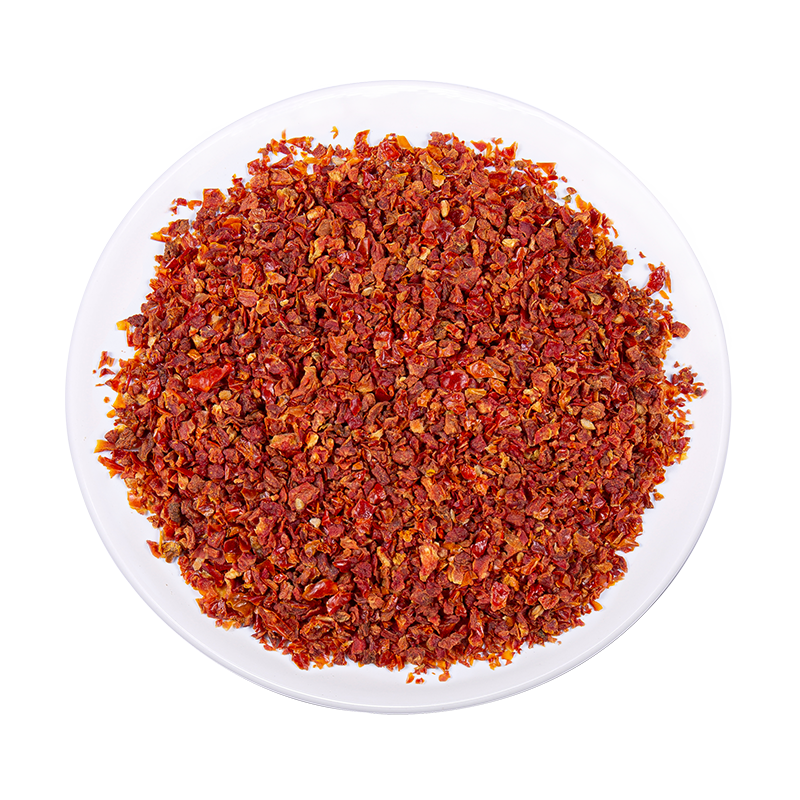
For bell-type peppers, stripping them into flakes before drying is a smart shortcut; a pound of strips shrinks to a small jar of chewy-sweet red chips. If you would rather keep a commercial batch of red pepper flakes on hand for weeknight cooking, dehydrated red pepper is a pantry-friendly substitute that requires no slicing or waiting.
 Dehydrated Red Pepper Flakes for Quick Weeknight CookingThis shelf-stable red pepper substitute adds sweet heat without slicing or waiting. Ideal for seasoning blends, soups, snacks, and ready meals.View Product →
The 150°F Process, Step by Step
Treat this as a rhythm, not a strict recipe. Because every oven has its own hotspots, the only non-negotiable part is checking regularly.
- Preheat the oven to 150–175°F. If possible, use convection. For non-convection ovens, keep the door cracked with a wooden spoon.
- Line a baking sheet with parchment paper. Place the prepared peppers in a single layer, leaving a little space around each piece.
- Put the sheet on the center rack. Rotate the pans front-to-back every 30–45 minutes to even out hot spots.
- If one piece dries before the rest, pull it out. Soggy neighbors can stay in while the only seems-dry pepper rests on a cooling rack.
- Continue until the thickest piece is brittle. For whole thin peppers, this usually means they rattle on the tray.
| Pepper type | Cut | Temperature | Estimated time | Doneness signal |
|---|---|---|---|---|
| Thin-walled (cayenne, Thai) | Whole | 140–160°F | 2–4 hours | Brittle, seeds rattle |
| Medium round (jalapeño) | Halved lengthwise | 150–175°F | 6–9 hours | Snaps with pressure |
| Thick bell (red, green) | Strips, ¼ inch | 150–175°F | 5–8 hours | No pliable centers |
| Large flat (poblano, anaheim) | Quartered | 150–175°F | 7–10 hours | Leathery turns brittle |
The numbers are a starting point. High humidity in your kitchen, whole peppers, or an older oven can add an hour or more. Judge by feel, not just the clock.
Done right: a dehydrated pepper should crack crisply. If you fold it and it bends, return it to the oven for another 30-minute interval.
Capsaicin in the Air: Ventilation Matters
Heating peppers releases capsaicin into the air, and oven drying is no exception. The effect is worse with hotter varieties and longer cycles. When you open the oven door to rotate trays, the first puff of air can hit your eyes and throat like pepper spray.
Warning: Run the range hood or open a window before you start. Avoid leaning over the oven while the chiles are working, and keep gloves on when handling the finished pieces.
Jalapeños sit at the milder end of the heat scale, but they still produce enough airborne compounds to make a small kitchen uncomfortable. Their thick walls also demand the longest drying run. If you want the smoky, slow-roasted taste of jalapeño in soup without spending half a day watching a baking sheet, crushed dehydrated jalapeño flakes give the same texture off the shelf.
Crushed Dehydrated Jalapeño Flakes for Smoky SpiceThese ready-to-use jalapeño flakes deliver the slow-roasted taste in soup or dips, saving hours of drying time and kitchen cleanup.View Product →
Danger: Do not crank the oven above 190°F hoping to speed things up. You will get browned, bitter peppers with a moist interior—and a much higher chance of spoilage later.
Grind, Store, and Keep the Heat Contained
Once the peppers are fully brittle, let them cool at room temperature for 20–30 minutes before handling. This step keeps leftover moisture from redistributing and stops the flakes from turning chewy in the jar.
Store whole pods or flakes in a glass jar with a tight lid, out of direct light. Kept cool and dry, they keep their color and heat for up to a year. If you want chili powder, grind them in small batches in a spice blender; a quick 20-second pulse at medium speed gives a rough flakes-and-powder mix ideal for cooking.
Large-scale facilities use the same logic—controlled low heat, continuous airflow, and a sealed packaging step—to produce dehydrated vegetables like green pepper in bulk. If you’re curious how raw vegetables become shelf-stable pantry ingredients, read how dehydrated vegetables are made in an industrial setting. For weeknight cooking, a tub of dehydrated green pepper flakes can save you the knife work entirely.
Dehydrated Green Pepper Flakes for Easy Pantry MealsSkip the knife work with these pre-dried green pepper flakes, perfect for stews, pasta, and snacks, backed by bulk industrial quality.View Product →The Last Batch in a Long Season
Oven dehydration is the rare preservation method that makes you slow down and look at the pepper rather than rush it through a hot pan. Low temperature, patient airflow, and a crisp snap are the whole game. Once you see how much flavor concentration a simple 160°F oven session can deliver, you may start buying extras at the market on purpose.
When the clock does not cooperate, well-made dehydrated pepper products are a dependable backup. But for the hands-on version, the oven method remains the most accessible way to turn a glut of garden chiles into a shelf lined with deep-red reserves.